Step-by-Step Instructions to Create A Welcoming Wreath.
Are you like many other women I know, who would rather create their own wreath than hang a boring same as everyone else type of wreath on their door?
Ya know what I am talking about. The fake-looking evergreen, with the big ball ornaments. Or how about the fresh one from the big box store that while pretty is just boring, thin, and doesn’t last much past Christmas?
This is where creating your own fresh, evergreen wreath shines!
I am a DIY lover. So, if I find out something can be done, I'm usually up for trying it out.
I hope to inspire and encourage you to try it too. Going out into nature or your backyard and creating something fun is rewarding! There are so many good ideas and inspirations for creating some truly unique wreaths.
I hope this post inspires you to think outside the box and really create something special for you.

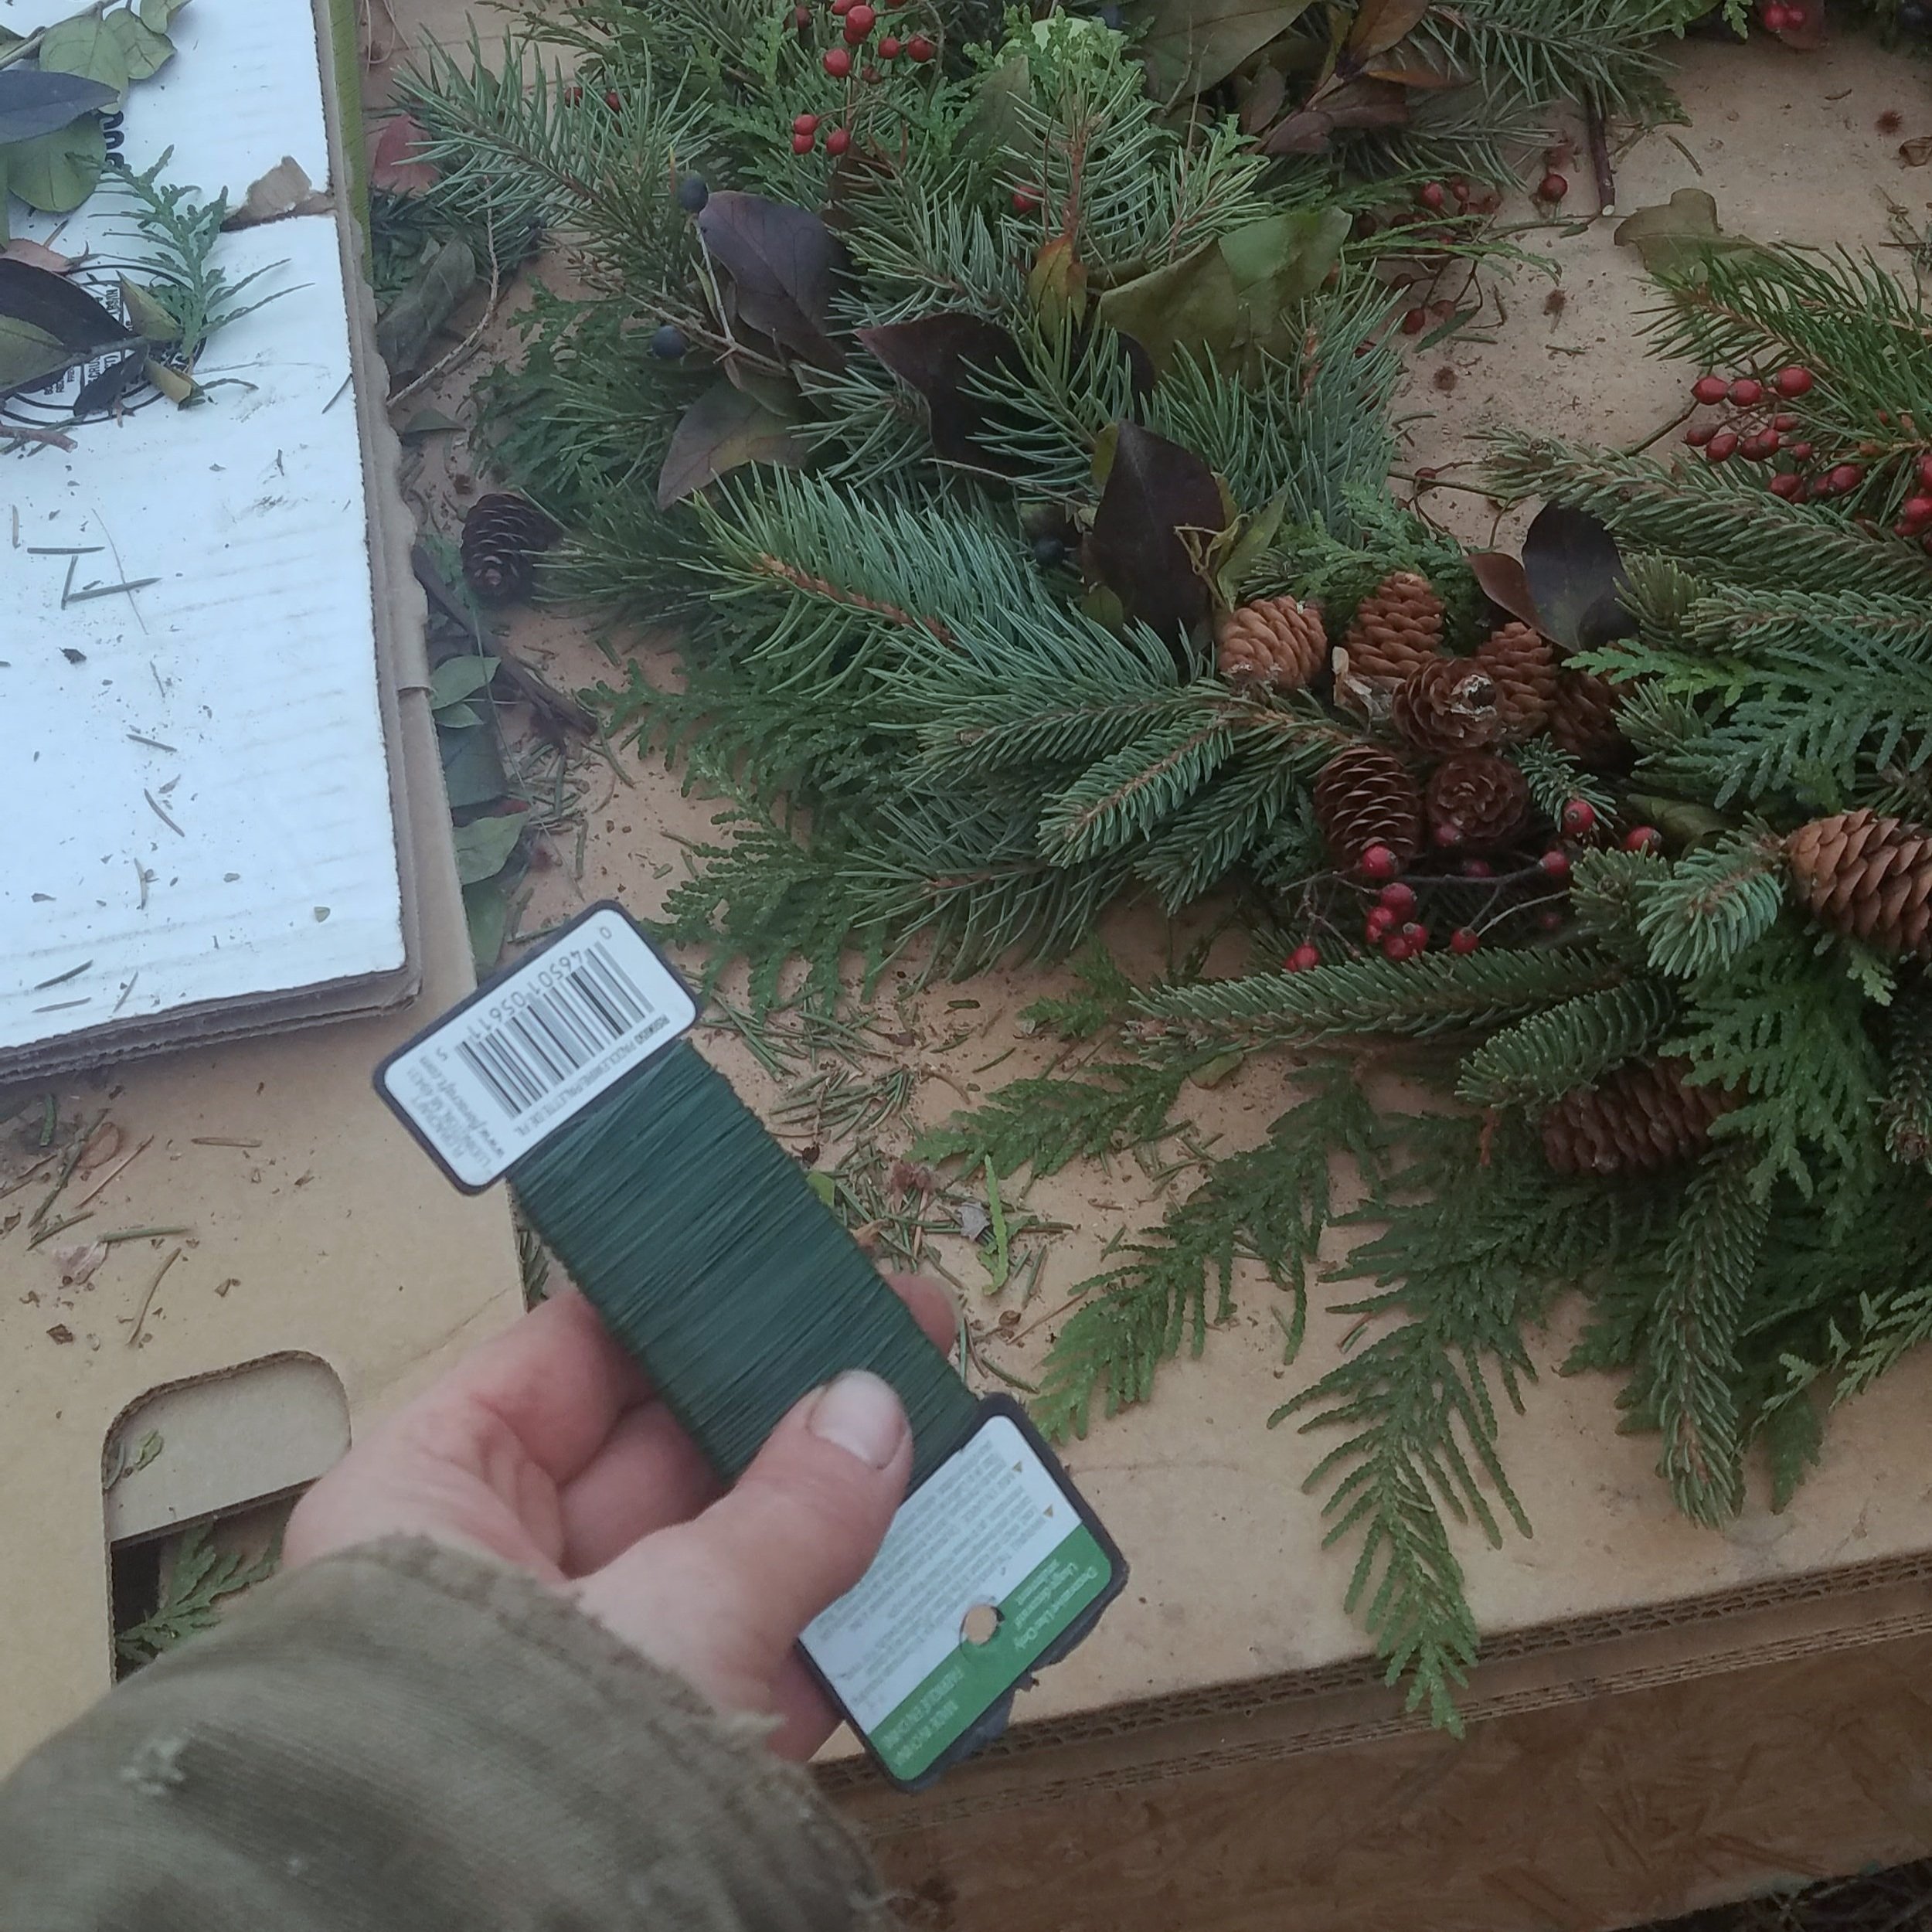
Use the paddle type. Do Not use the spools. You cannot get enough resistance with them.
Below is how I assemble my wreaths. There are many ways and, ultimately, no rules. It's your wreath. You make it any way you want.
Have fun with it, take your time, and enjoy the process. The reward of putting pieces of nature together in art is quite addicting.
One last reminder: any mistakes can be fixed. Just add is some more greens, clip a few off, and put a pinecone in.
Don’t be a perfectionist, but let it be unique and handmade. We don’t want it to look like the store made it.
Evergreen Wreath Instructions
What you will need:
Pruners
Wire
Cutters
One spool of green 22-gauge floral or paddle wire, I've used 26 gauge, which works okay, too.
One wire or grapevine wreath frame, 14-inch to 18 is what I use.
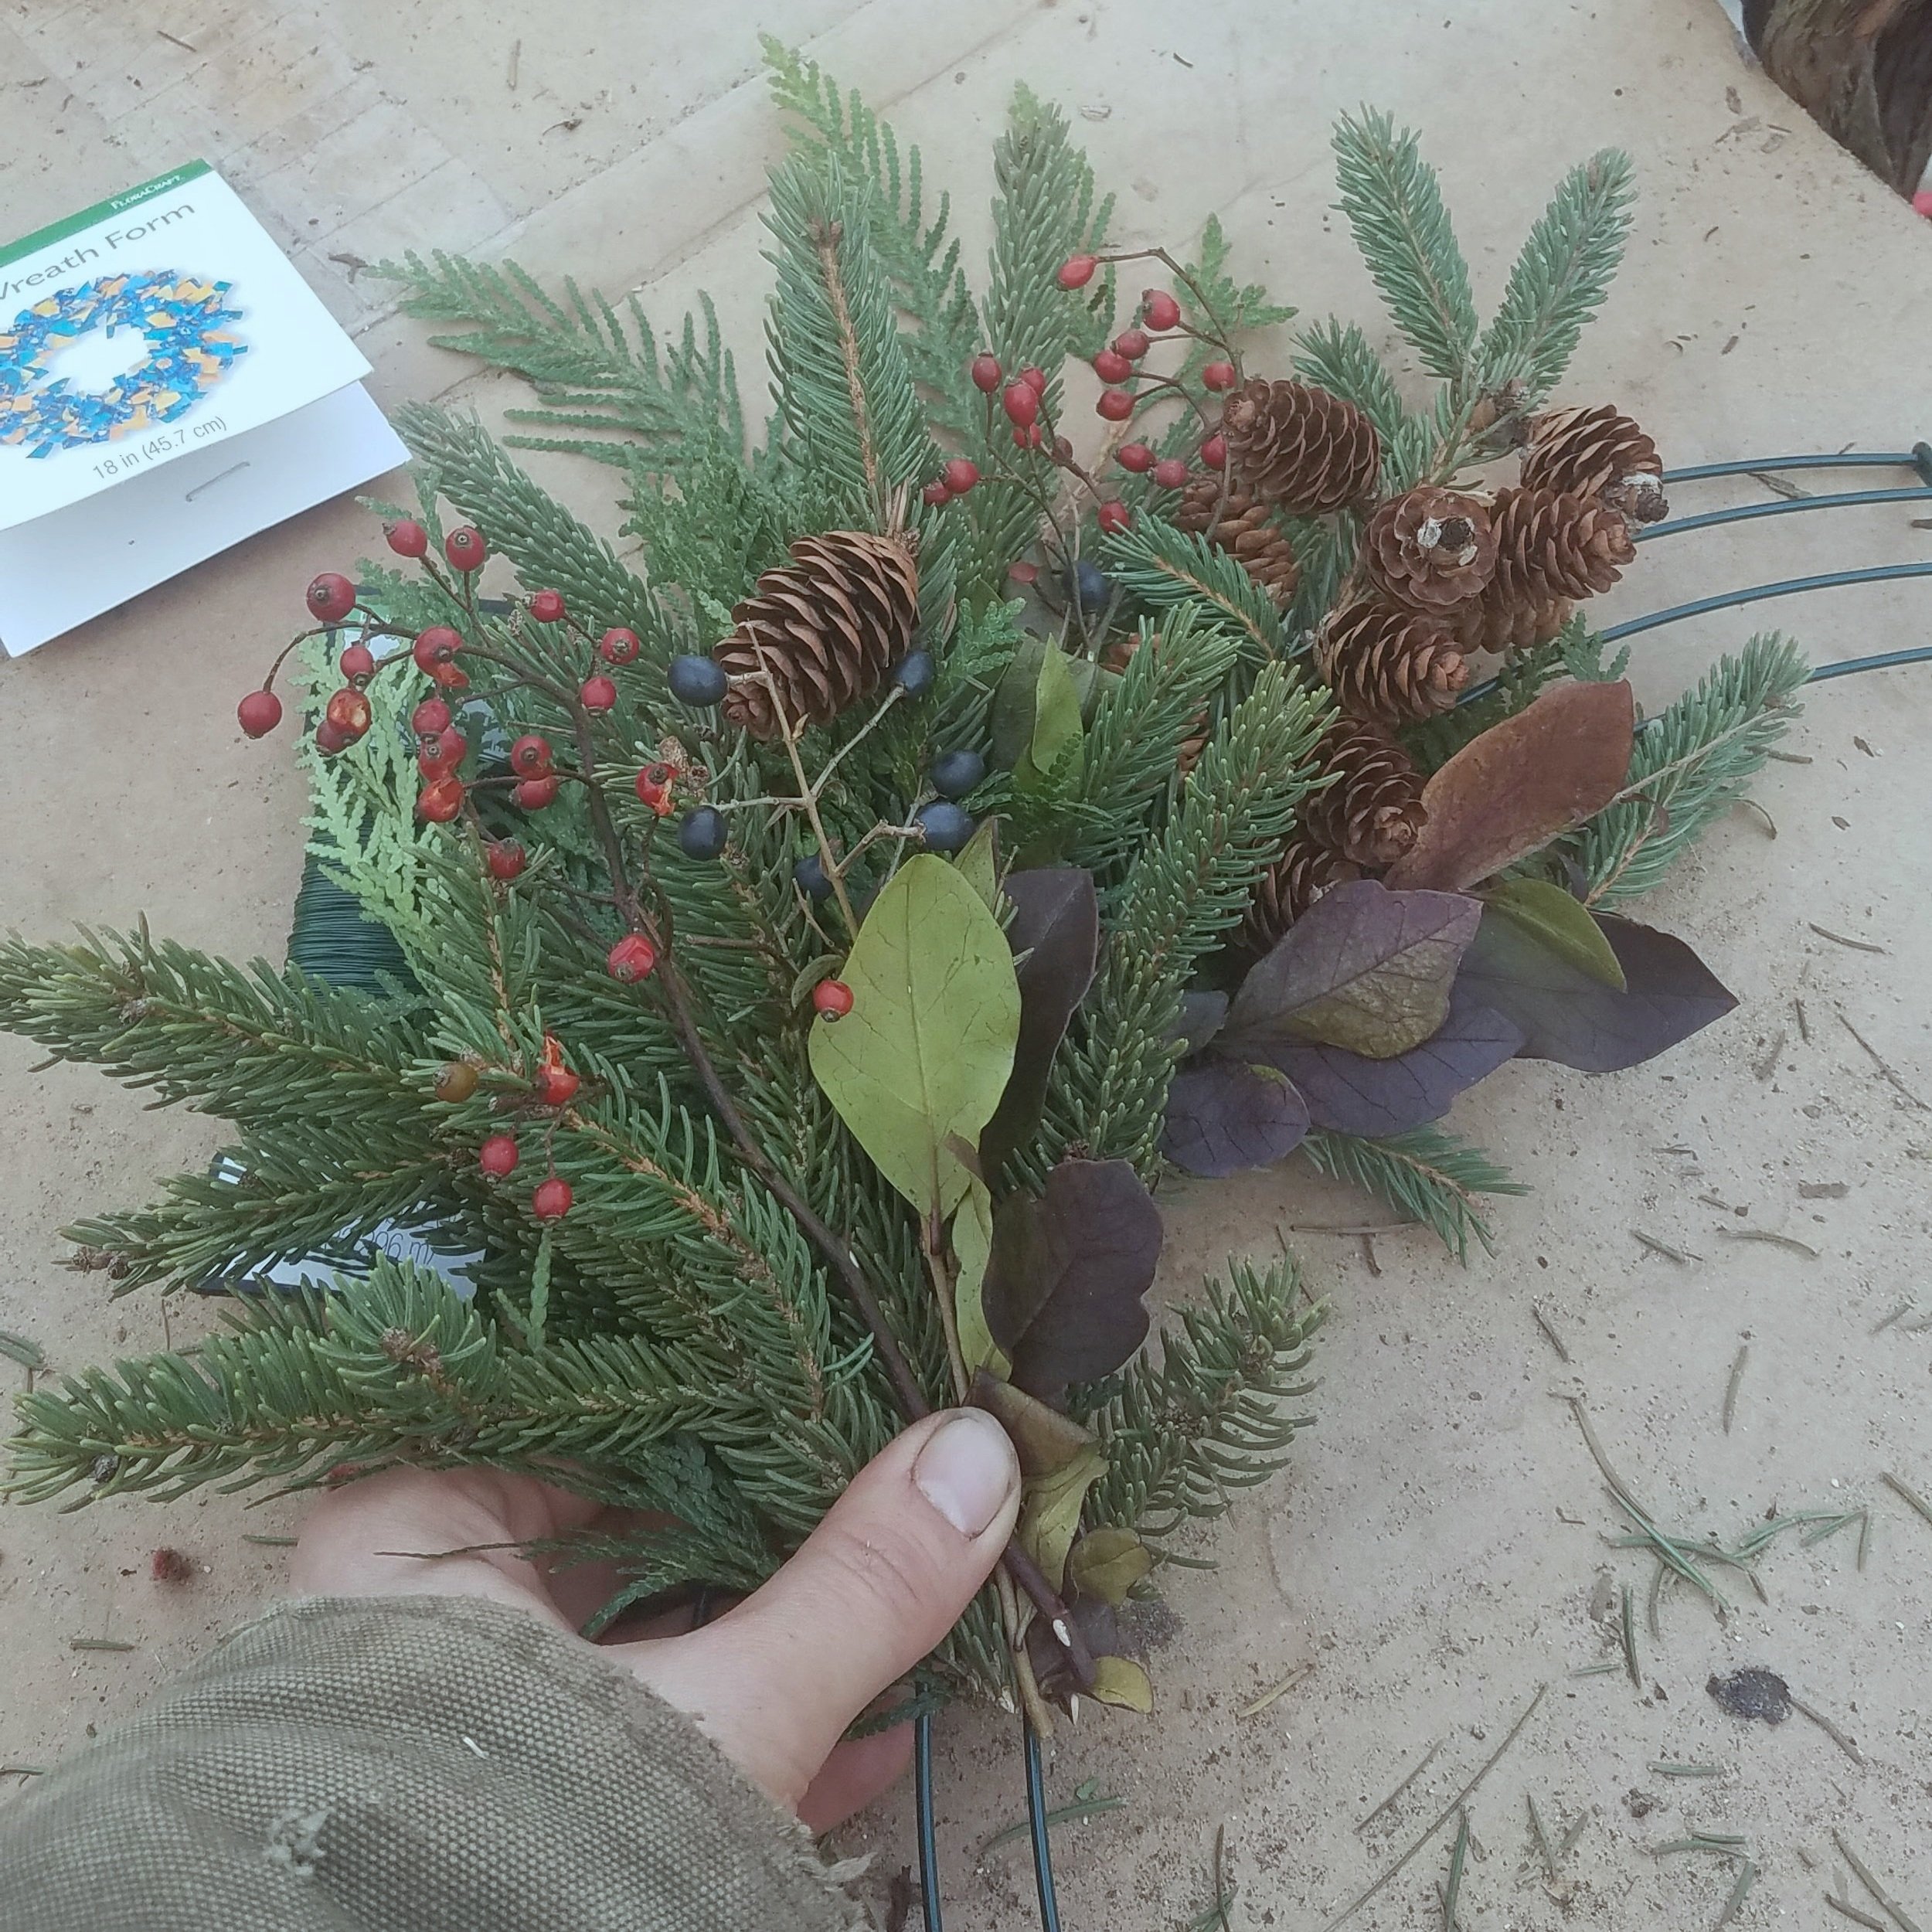
Assorted evergreens - at least 90 stems in 6 to 8 inch lengths (purchase here)

Optional: pine cones, clusters or berries, holly, ivy, twigs, wheat, grass, or anything that looks interesting to add.
Start with a wreath form. These can be either a wire wreath form or a grapevine wreath. It depends on the look you are going for. Also, pick your size. I use 18-inch wreath forms, but you can do any size you want.
Cut your assorted evergreens into 6 to 8 lengths.
I like to separate everything into piles. Take your more basic stems and stack stems on top of each other, with your more interesting stems on the top. These make a nice little bundle. Make 15-18 bundles, depending on the size, which is suitable for an 18-in wreath form.
Wrap the base of the stems together with the wire. Pull tight; you don't want your stems to slip out—Wrap 3 to 4 times around.
Lay a bundle of greens on your wreath frame and secure it to the frame with 3 to 4 wraps of wire. Don't cut your wire. Pull tight.
Move a few inches down and wire on the next bundle. Keep all your greenery facing the same direction. Make sure this bundle covers the stems of the last bundle and the wire frame. I like to place my first bundle centered on the frame, my second one facing a little upwards, and my third a little downwards, and continue around the frame. You can go straight all the way around as well.
When I get to the end, I will make a few small bundles and tuck them in underneath the first bundle to make it look even. You can also wire your pine cones and berries or a ribbon there. Cluster these together to give it the most significant impact.
Wreaths will last months outside, depending on your ingredients and temperature.
If kept in a warm room, mist it twice daily with water.
Purchase a bundle of assorted evergreens HERE. Fresh and full of texture, all you need to do is start clipping and wrapping.